Setting Up Powerline Shell on Windows Subsystem for Linux

Installing Fonts
Powerline Shell uses custom patched fonts for the glyph icons it uses. Contrary to the documentation, you actually need to install these fonts in Windows and set the console host font to one of them.
This is pretty simple to do; first clone the repository, install the fonts and delete the repository.
git clone https://github.com/powerline/fonts.git
cd fonts
./install.ps1
cd ..;rm -r -for ./fonts
When you run the install script, windows will act a little weird as it installs each font individually popping up a dialog for each. After several of these dialogs you should be good to go.
Next open bash and click the icon in the upper left corner and select Properties. Change to the Font tab and select one of the patched fonts you just installed. They will all say "for Powerline" so just pick one of those.
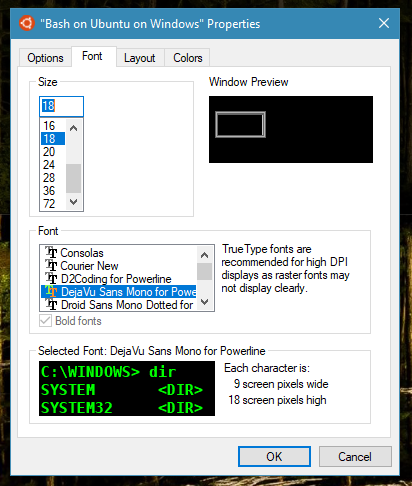
While you have this dialog open, switch to the Colors tab and drop your Opacity down to around 90%. This is a sign of being a true CLI nerd and others will recognize your CLI Alpha-ness in appreciation.

Setting Up A General Development Environment
This post is assuming that you have a clean install of Windows Subsystem for Linux. So, we need to do somethings to get our bash environment ready for Powerline Shell.
I have covered this topic in the past, so I will just run through the commands here. Check the previous post for screenshots and hand holding.
We need to update apt-get, install build tools and git. The commands are as follows. Run these in your bash prompt.
sudo apt update
sudo apt upgrade
sudo apt-get install build-essential
sudo apt-get install git
sudo apt-get install python-pip
The only difference here between the other post and these commands is I have added the installation of python and pip to the mix. Powerline Shell is a set of python scripts we will need them.
Installing Powerline Shell
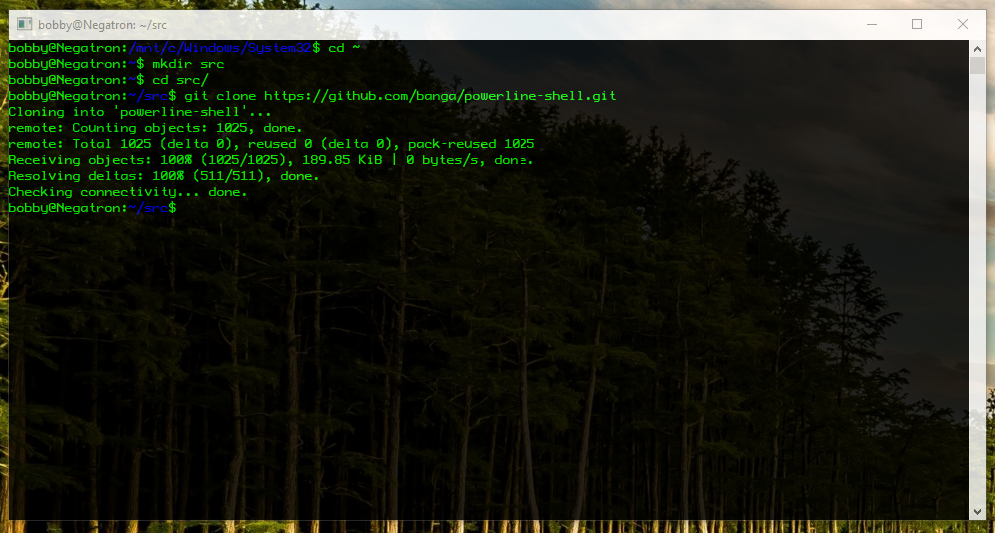
First we need to clone the Powerline Shell repository. I typically keep my code in a src folder located in my home ~ directory. So run these commands to pull the source.
cd ~
mkdir src
cd src
git clone https://github.com/banga/powerline-shell.git
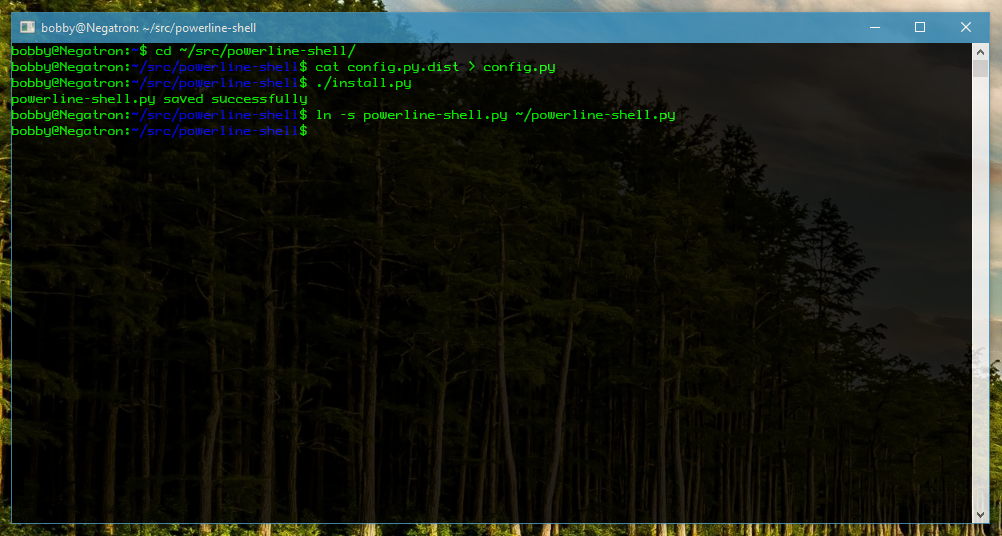
Next, we need to create our config file and run the install script.
cd ~/src/powerline-shell
cat config.py.dist > config.py
./install.py
Finally, we need to update our .bashrc file to change our prompt to use Powerline Shell. We can use vim to accomplish this. Don't worry if vim is scary I'll walk you through it.
First, let's make sure you have a .bashrc file.
cd ~
ls -a
If you don't see the file listed, you can create one easily with touch .bashrc.
Next, open the file in vim.
vim .bashrc
vim is a little weird if you have not used it before. When it first starts up it will display the contents of your file in normal mode. Using your cursor keys, scroll down to the bottom of the file.
Now hit the i key to enter insert mode. Create a new line and add the following text. Pay special attention to the spacing around the if statement.
function _update_ps1() {
    PS1="$(~/src/powerline-shell/powerline-shell.py $? 2> /dev/null)"
}

if [ "$TERM" != "linux" ]; then
    PROMPT_COMMAND="_update_ps1; $PROMPT_COMMAND"
fi
Once you have it all entered, hit the esc key to go back to normal mode. Now enter shift : to bring up the command prompt and enter the command wq and hit enter. This will write the changes to the file and quit the vim editor.
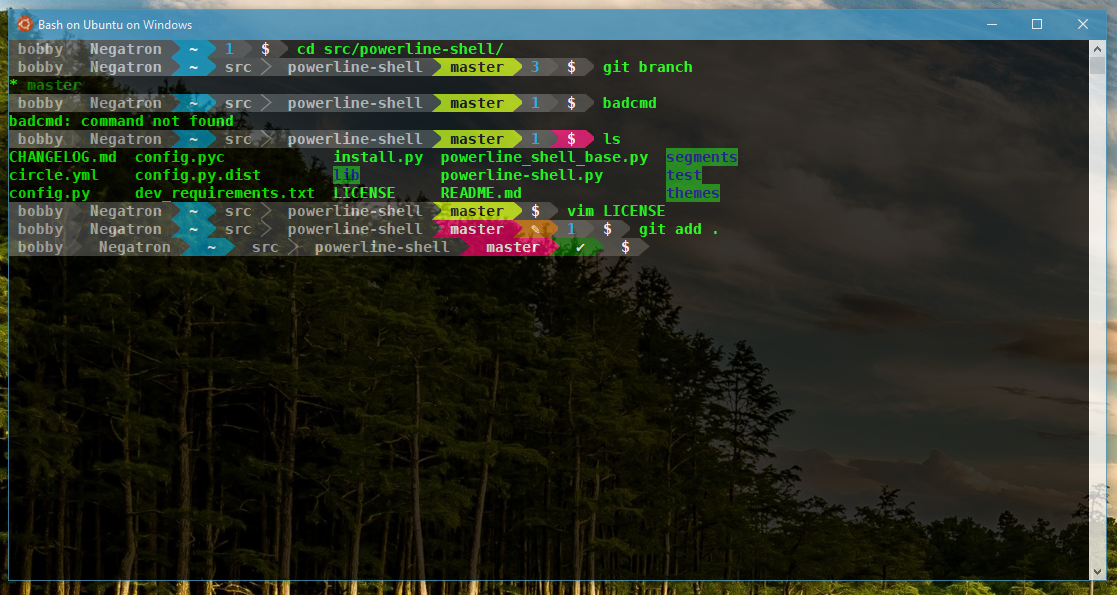
All that is left to do, is close the window and fire it back up. Navigate around & checkout a git repository. Of course you can customize the prompt quite a bit. The documentation can be found here.
"DSC_0183" By Orln Blomberg is licensed under CC BY 2.0